Table of Contents
The world of AI video generation is moving at light speed. Just when we mastered creating short, 8-second clips, the entire game changed. The challenge is no longer just generating a video; it’s about storytelling. How do you maintain a consistent character? How do you create multiple scenes that flow together? How do you move from a simple prompt to actual filmmaking?
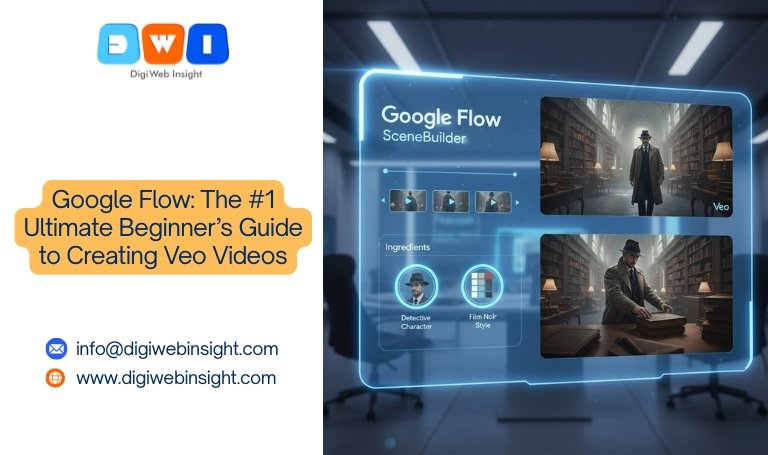
Google’s answer is here, and it’s a powerful combination of two names: Veo and Google Flow.
If you’re a creator, marketer, or filmmaker who’s heard these terms, this is the guide for you. We’re moving past the hype and giving you a practical, step-by-step beginner’s guide. You’ll learn what Google Flow is, how it uses the powerful Veo model, and how you can use its unique features—like the SceneBuilder and “Ingredients”—to start directing your first AI-generated videos today.
First, What is Google Veo? (The Engine)
Before you can understand the car, you need to understand the engine.
Google Veo (currently on models like Veo 3 and Veo 3.1) is Google’s most advanced and powerful AI video generation model. Think of it as the “engine” that does the heavy lifting. It’s the part of the AI that understands complex prompts and generates high-definition, photorealistic video clips.
Veo is a direct competitor to other models like OpenAI’s Sora. Its key capabilities are astounding:
High-Quality Output: It can generate 1080p and higher resolution videos.
Cinematic Understanding: It understands film terms. You can ask for a “dolly zoom,” a “crane shot,” or an “aerial shot of a coastline at sunset,” and it knows what you mean.
Incredible Consistency: It’s designed to maintain the appearance of characters and objects across multiple shots.
Advanced Physics & Motion: It has a sophisticated understanding of how people move and how objects interact with the world.
Integrated Audio: It can generate synchronized audio, including dialogue, sound effects, and music, all from the same prompt.
In short, Veo is the raw power. But raw power needs a steering wheel. That’s where Google Flow comes in.
What is Google Flow? (The Director’s Chair)
This is the most important concept for a beginner to grasp.
Google Flow is the creative tool or filmmaking interface that Google built to let you control the Veo model. If Veo is the engine, Google Flow is the director’s chair, the editing suite, and the camera all rolled into one.
Announced at Google I/O 2025, Flow is a web-based platform found in Google Labs (this is an excellent external link for E-E-A-T). It’s designed specifically for creatives to “seamlessly create cinematic clips, scenes, and stories.”
The problem with most AI video tools is that you “prompt and pray.” You type a description, hit generate, and hope for the best. Google Flow is designed to solve this. It’s built around a workflow (hence the name “Flow”) that gives you, the creator, unprecedented control.
Its key features, which we’ll cover in this guide, are:
SceneBuilder: A visual timeline that lets you connect multiple clips, extend them, and build a full narrative.
“Ingredients”: A feature that lets you upload reference images (of a character, a style, or an object) to keep them consistent across all your scenes.
Advanced Controls: The ability to edit within a video, such as adding or removing objects, or changing the background.
While Veo is also available to developers via Google’s Vertex AI, Google Flow is the hands-on, user-friendly tool built for creators.
Getting Started: Access, Pricing, and Setup
Before you can direct your masterpiece, you need to get access to the studio.
How to Get Google Flow
As of 2025, Google Flow and the Veo models are premium features. They are not free. You need a subscription to one of Google’s advanced AI plans.
Google AI Pro Plan: This is the standard tier, often part of the Google One AI Premium subscription. This plan gives you access to Flow, Veo models (like Veo 3 Fast), and Gemini Advanced.
Google AI Ultra Plan: This is the top-tier plan for heavy users, offering more credits and first access to the most powerful models (like Veo 3 Quality).
Once you’re subscribed, you can access Google Flow by visiting the Google Labs website and logging in with your Google account.
Understanding the Interface (The 30-Second Tour)
When you first open a new Google Flow project, you’ll see a few key things:
The Prompt Bar: This is where you’ll type your text-to-video descriptions.
The “Ingredients” Panel: This is where you can upload your reference images for character and style consistency.
The SceneBuilder: This is your timeline. At first, it will be empty, waiting for your first clip.
Settings: Here, you can choose your model:
Fast Model (e.g., Veo 3 Fast): Use this for testing. It’s quicker, uses fewer credits, but the quality is lower (and may not have audio).
Quality Model (e.g., Veo 3 Quality): Use this for your “final” renders. It’s slower, uses more credits, but produces stunning, high-resolution results with full audio.
Credits: Keep an eye on your credit balance. Every generation (especially on “Quality” models) will consume credits.
Google Flow: A Step-by-Step Beginner’s Guide to Your First Veo Video
Let’s make a short, two-scene video. Our goal: A detective finds a clue in an old library.
Step 1: Prepare Your “Ingredients” (The Consistency Secret)
This is the most important “pro” tip for a beginner. Do not skip this. For our detective story, we need our detective to look the same in both shots.
First, use an AI image generator (like Google’s Imagen, also in the AI Pro plan) to create a reference image.
Prompt: “Portrait of a male detective, 1940s film noir style, wearing a fedora and a trench coat, skeptical expression.”
Once you have an image you like, go to the “Ingredients” panel in Google Flow.
Upload your detective’s portrait. You can “tag” it as “Detective.”
Now, Google Flow will reference this image for every video it generates in this project, ensuring your character remains consistent. You can also add images for the “style” (e.g., a dark, moody film noir still) or the “setting” (e.g., a photo of an old library).
Step 2: Prompt Your First Scene (Text-to-Video)
Let’s set the scene. Go to the prompt bar. Instead of a simple prompt, use the Google Flow “formula” for cinematic control:
[Cinematography] + [Subject] + [Action] + [Context] + [Style]
Don’t write: “A detective in a library.”
Do write: “A low-angle wide shot of the [Detective] walking slowly between towering, dusty bookshelves in an old, silent library. The only light comes from a desk lamp at the end of the hall. Cinematic, film noir style, dramatic shadows.“
Notice we used [Detective]. This tells Flow to use the “Ingredient” we uploaded. We also specified the camera shot, action, context, and style.
Now, select the “Fast” model (to test) and click “Generate.”
Step 3: Review, Select, and Add to SceneBuilder
Google Flow will generate a few options (usually 2-4). Click “Play” to review them.
Let’s say you like “Clip 2.” Hover over it and click “Add to SceneBuilder.”
Boom! Your clip now appears as the first block in your timeline. It’s probably about 8 seconds long. This is your “Scene 1.”
Step 4: Use the SceneBuilder to Extend Your Story
This is where the flow happens. You now have a new set of options for your scene in the timeline. You can:
Extend Scene: This is for making the current clip longer.
Add Scene (Jump To): This is for creating a new clip that follows the first one.
We want a new scene (a close-up). So, click the “+” icon after your first clip and select “Add Scene (Jump To).”
A new prompt box appears for Scene 2. Google Flow automatically carries over the “Ingredients” and context. Now, we write a prompt for our close-up:
Scene 2 Prompt: “An extreme close-up shot of the [Detective]’s hand as he picks up an old, leather-bound book from a desk. He blows dust off the cover. Sounds of a ticking clock and a single ‘thud’ as the book is placed.“
We added a sound prompt this time. Now, hit “Generate” for this new scene.
Step 5: Finalize, Add Audio, and Download
Google Flow will generate your second scene, ensuring the detective’s hand, trench coat sleeve, and the library’s lighting match Scene 1.
Add to SceneBuilder: Select the best close-up, and it will snap into place after Scene 1 in your timeline.
Playback: You can now hit the main “Play” button on the SceneBuilder to watch your full 16-second, two-shot film. It flows from a wide shot to a close-up, all with a consistent character.
Upgrade Quality: If you like it, you can now re-generate the entire sequence using the “Veo 3 Quality” model.
Download: Once rendered, you can download your final video.
You just used Google Flow to direct, not just generate. You managed character consistency, camera angles, and pacing between scenes—all from a web browser.
Google Flow vs. Other Tools: Why is it Different?
Understanding why this tool exists is key for a beginner.
Google Flow vs. Google Vids: Google Vids (part of Workspace) is for making simple business videos, presentations, and storyboards. It also uses Veo, but it’s like “Google Slides for video.” Google Flow is a high-end, dedicated filmmaking tool for creative, cinematic storytelling.
Google Flow vs. Vertex AI: Google Cloud Vertex AI is a developer platform (API). It’s for engineers who want to build their own apps using the Veo model. Google Flow is the finished app Google built for creators.
Google Flow vs. Competitors (Runway, Pika): Flow’s main advantages are the deep integration of Google’s best models (Veo 3.1, Imagen, Gemini) and its emphasis on narrative control. The “Ingredients” and “SceneBuilder” are specifically designed to solve the biggest problems in AI video: consistency and multi-shot storytelling.
Pro-Tips for Your Google Flow Workflow
Use “Fast Mode” 90% of the Time. Only switch to “Quality” models for your final render. You will burn through your credits otherwise.
Use “Flow TV” for Inspiration. Google Flow includes a showcase called “Flow TV” (you can find it in the Google Labs help section) that features content made with the tool and the prompts used to make it. It’s the best way to learn.
Master “Frames-to-Video.” Besides Text-to-Video, you can upload a starting image and bring it to life. This is called “Frames-to-Video” or “Image-to-Video” and is great for animating a still photo.
Think in Scenes, Not Clips. The entire purpose of Google Flow is to break you out of the “one-shot” mindset. Plan a simple 3-scene story and try to build it.
Be Patient. This technology is incredible, but it’s not magic. You will need to re-generate prompts, tweak your wording, and experiment.
The Future: Where Google Flow and Veo are Headed
This is just the beginning. The goal of Google Flow is to become a complete, AI-powered filmmaking suite. The features we see now—SceneBuilder, extending clips, in-painting objects, and audio generation—will only get tighter and more powerful.
For marketers, this means the ability to create entire, high-quality advertisements from a single prompt. For agencies, this is a powerful new service. Our team at DigiWeb Insight is already exploring how tools like Google Flow can revolutionize pay-per-click (PPC) marketing and social media content, making it possible to A/B test video concepts at a fraction of the traditional cost.
Conclusion
Google Flow is not just another AI toy. It’s a serious creative tool that, for the first time, puts the power of an advanced model like Veo into a workflow designed for storytellers. It solves the “prompt-and-pray” problem by giving you a SceneBuilder for narrative and an “Ingredients” feature for consistency.
For beginners, the learning curve is all about shifting your thinking. Stop thinking about “a prompt for a clip” and start thinking like a director: What’s my first shot? What’s my second? How do they connect?
You now have the foundational knowledge to open Google Flow and create your first Veo video. The rest is up to your imagination.
Frequently Asked Questions (FAQ)
1. What is the difference between Google Flow and Google Veo?
Think of Veo as the powerful “engine” that generates the video. Google Flow is the “car” or “filmmaking tool” that you use to control and direct that engine. Flow is the interface where you type prompts, build scenes, and add consistent characters.
2. How much does Google Flow cost?
Google Flow is a premium tool. It is not free. Access is included with a subscription to Google’s paid AI plans, such as the Google AI Pro plan (part of Google One) or the Google AI Ultra plan.
3. Can Google Flow maintain character consistency?
Yes. This is one of its primary features. You use the “Ingredients” panel to upload a reference image of your character. Google Flow will then use that image to ensure the character looks the same in every new scene you generate for that project.
4. Can I create videos longer than 8 or 10 seconds?
Yes. While a single generation might be 8 seconds, the SceneBuilder in Google Flow is designed to let you “extend” that clip or “add a new scene” that flows seamlessly from the first. This allows you to chain multiple clips together to create a much longer, coherent story.